Creating an Ashby API Key with Full Read Permissions

Steps to Create an Ashby API Key with Full Read Permissions
- Log in to Ashby
- Open your web browser and navigate to https://app.ashbyhq.com.
- Sign in with your admin credentials. If you don’t have admin access, contact your organization’s Ashby administrator to proceed.
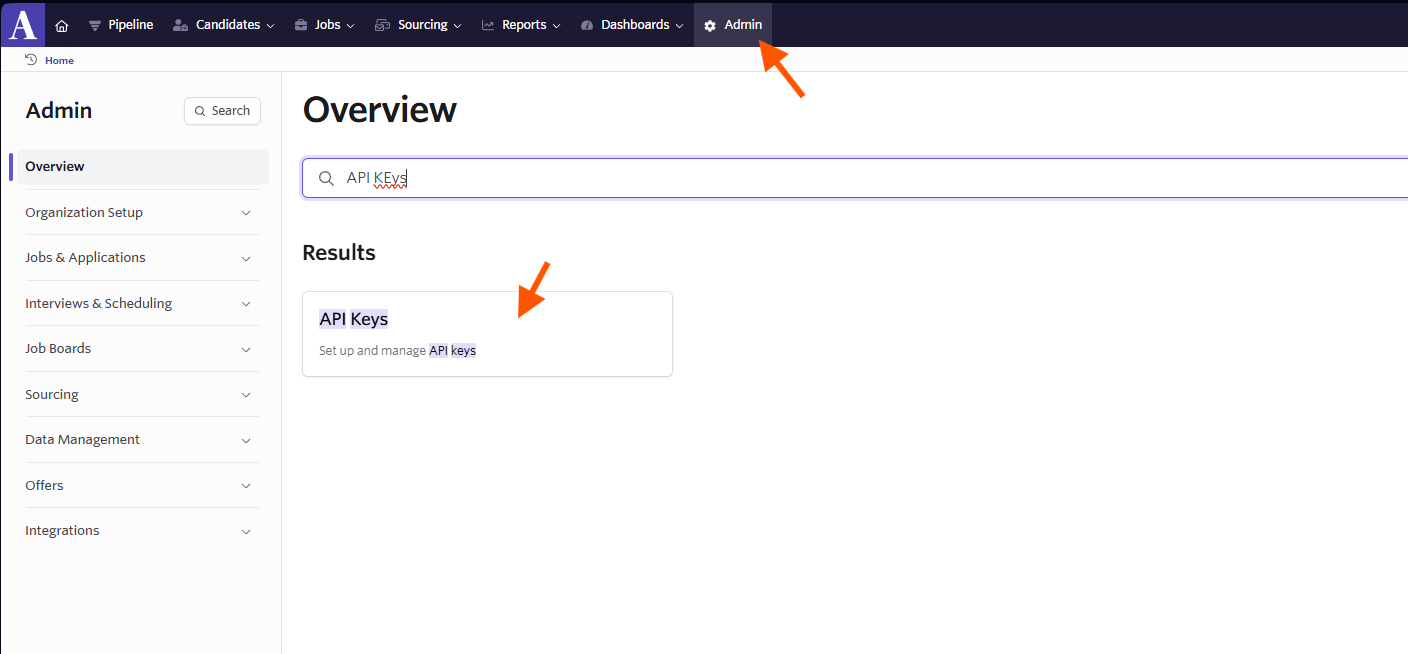
- Navigate to the API Key Management Section
- Once logged in, go to the Admin panel. This is typically accessible from the main navigation menu.
- In the Admin panel, locate and select Ashby API or API Keys. The exact label may vary, but it’s generally under a section related to integrations or developer settings.
- You should see a list of existing API keys (if any) and an option to create a new one.

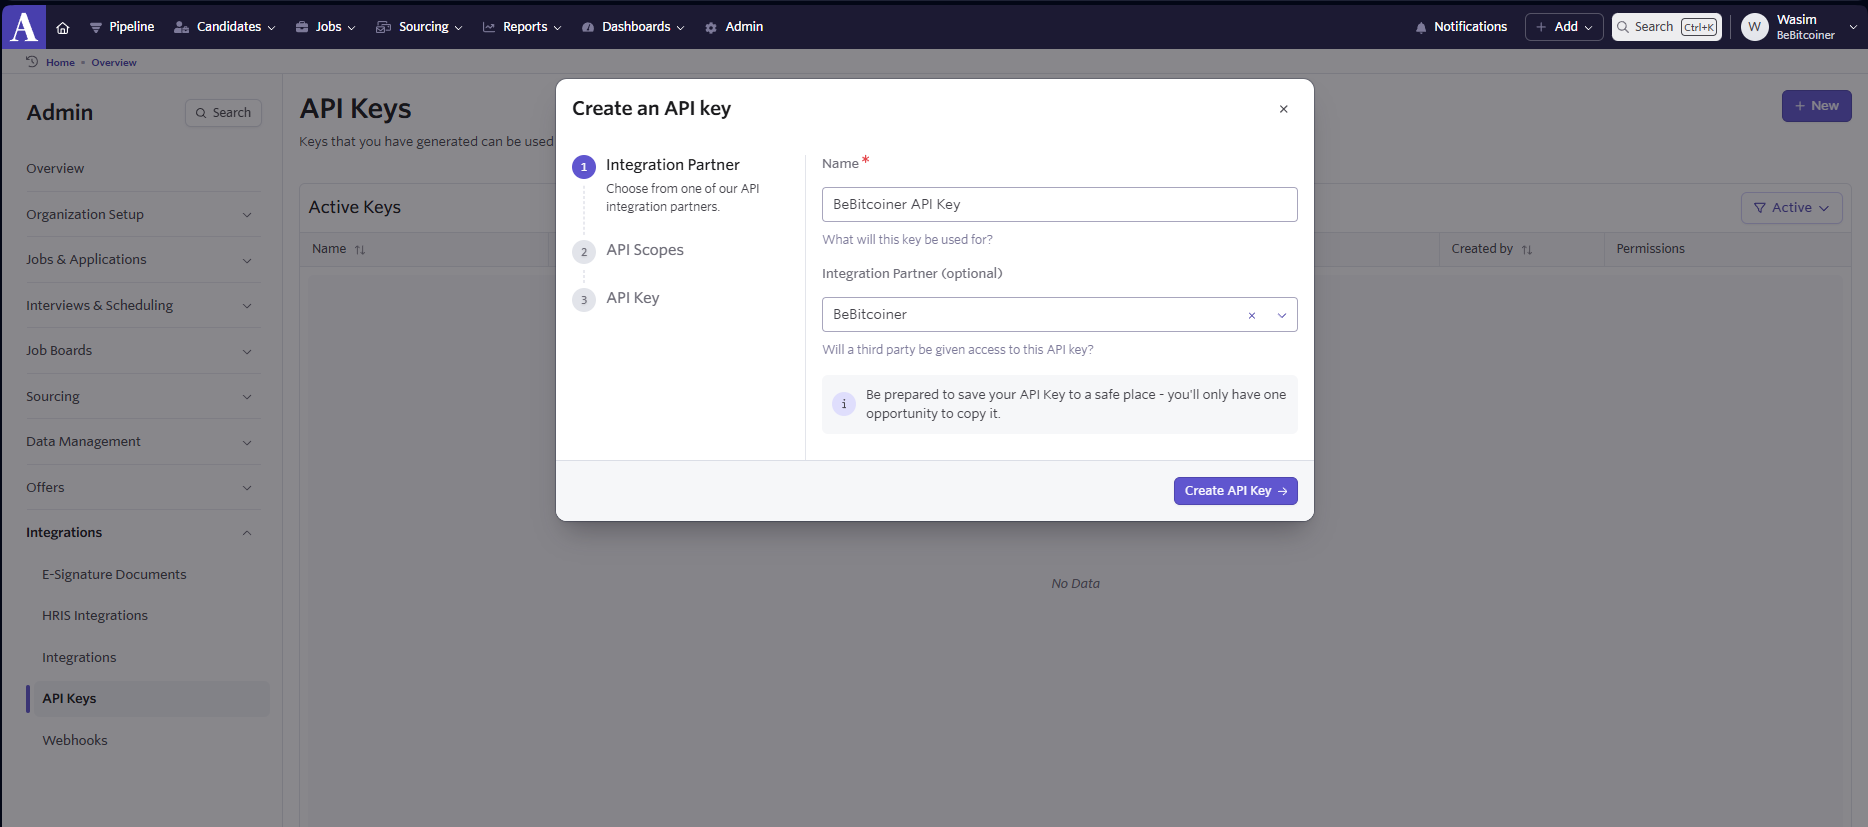
- Create a New API Key
- Click the + New or Create New API Key button.
- Provide a descriptive name for the API key, such as “Full Read API Key” or “Integration Read-Only Key.” This helps identify its purpose later.
- As integration partner, choose BeBitcoiner.

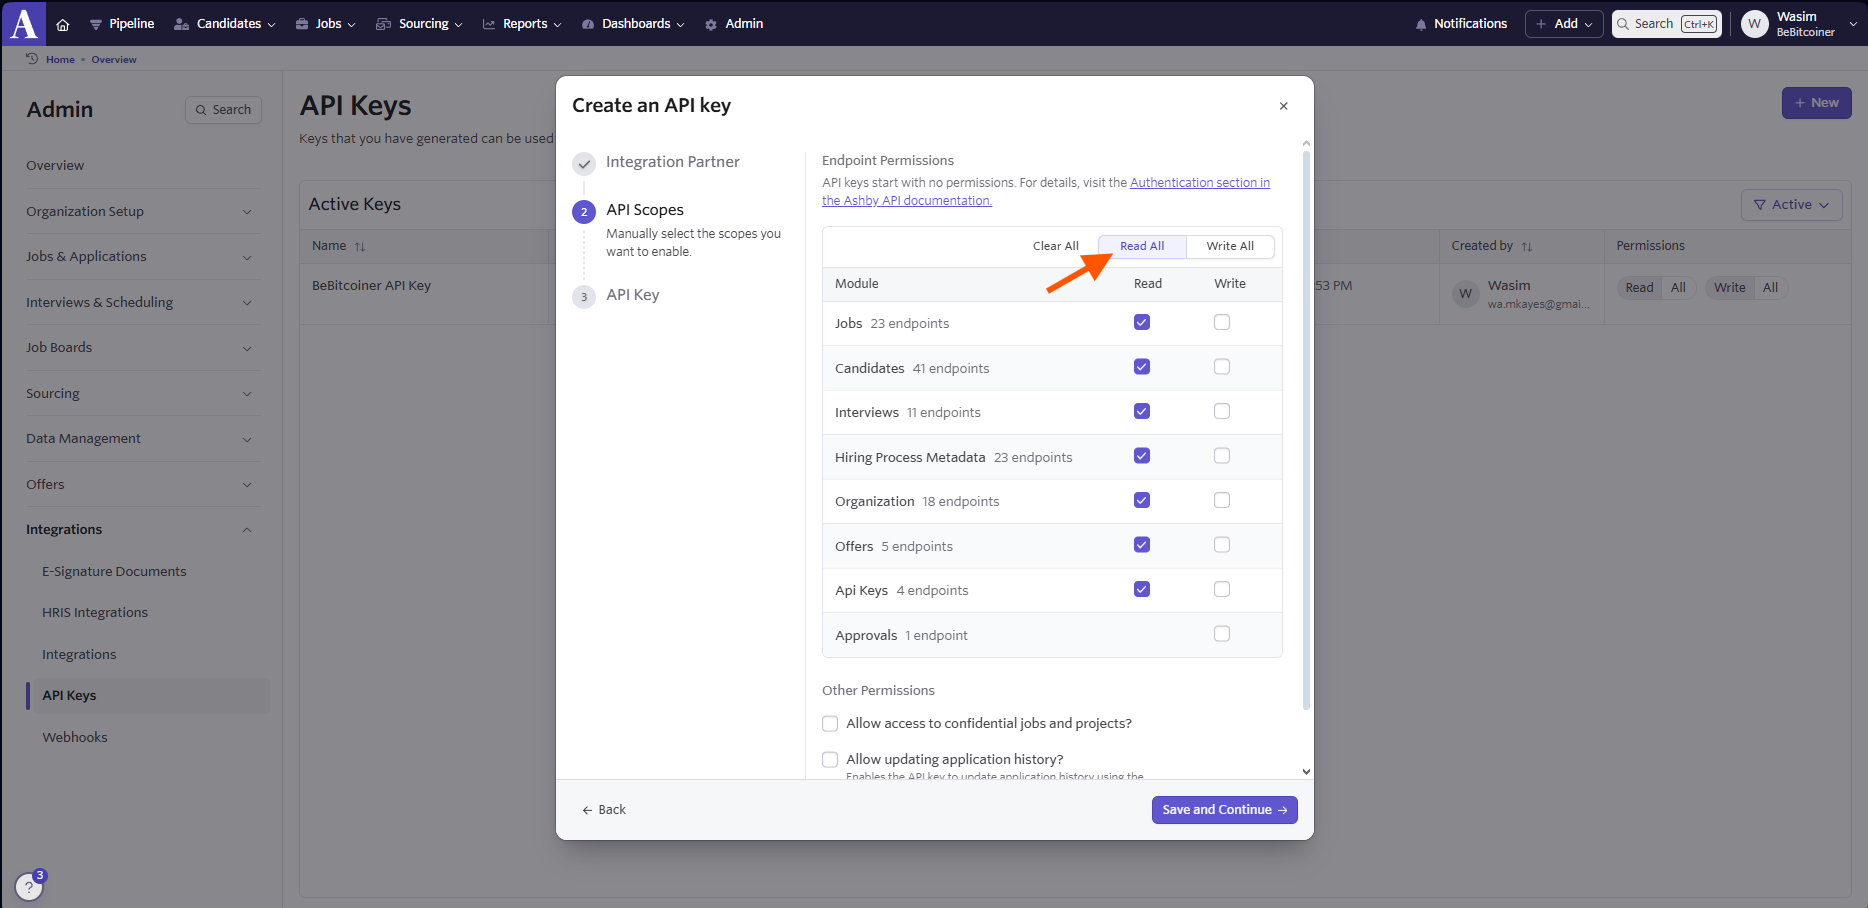
- Configure Permissions for Full Read Access
- During the API key creation process, you’ll be prompted to assign permissions. Ashby organizes permissions by module, with each module having separate read and write access.
- You need to grant full read permissions, select Read access for all available modules. Common modules include:
- Candidates: Access to candidate profiles and details.
- Applications: Access to application data and statuses.
- Jobs: Access to job postings and related information.
- Interviews: Access to interview schedules and feedback.
- API Keys: Access to retrieve information about API keys (e.g., apiKeysRead).
- Other modules as applicable to your organization.
- If there’s an option for “All Permissions” or “Full Access,” clarify with Ashby support whether this includes write access, as you want to limit to read-only.

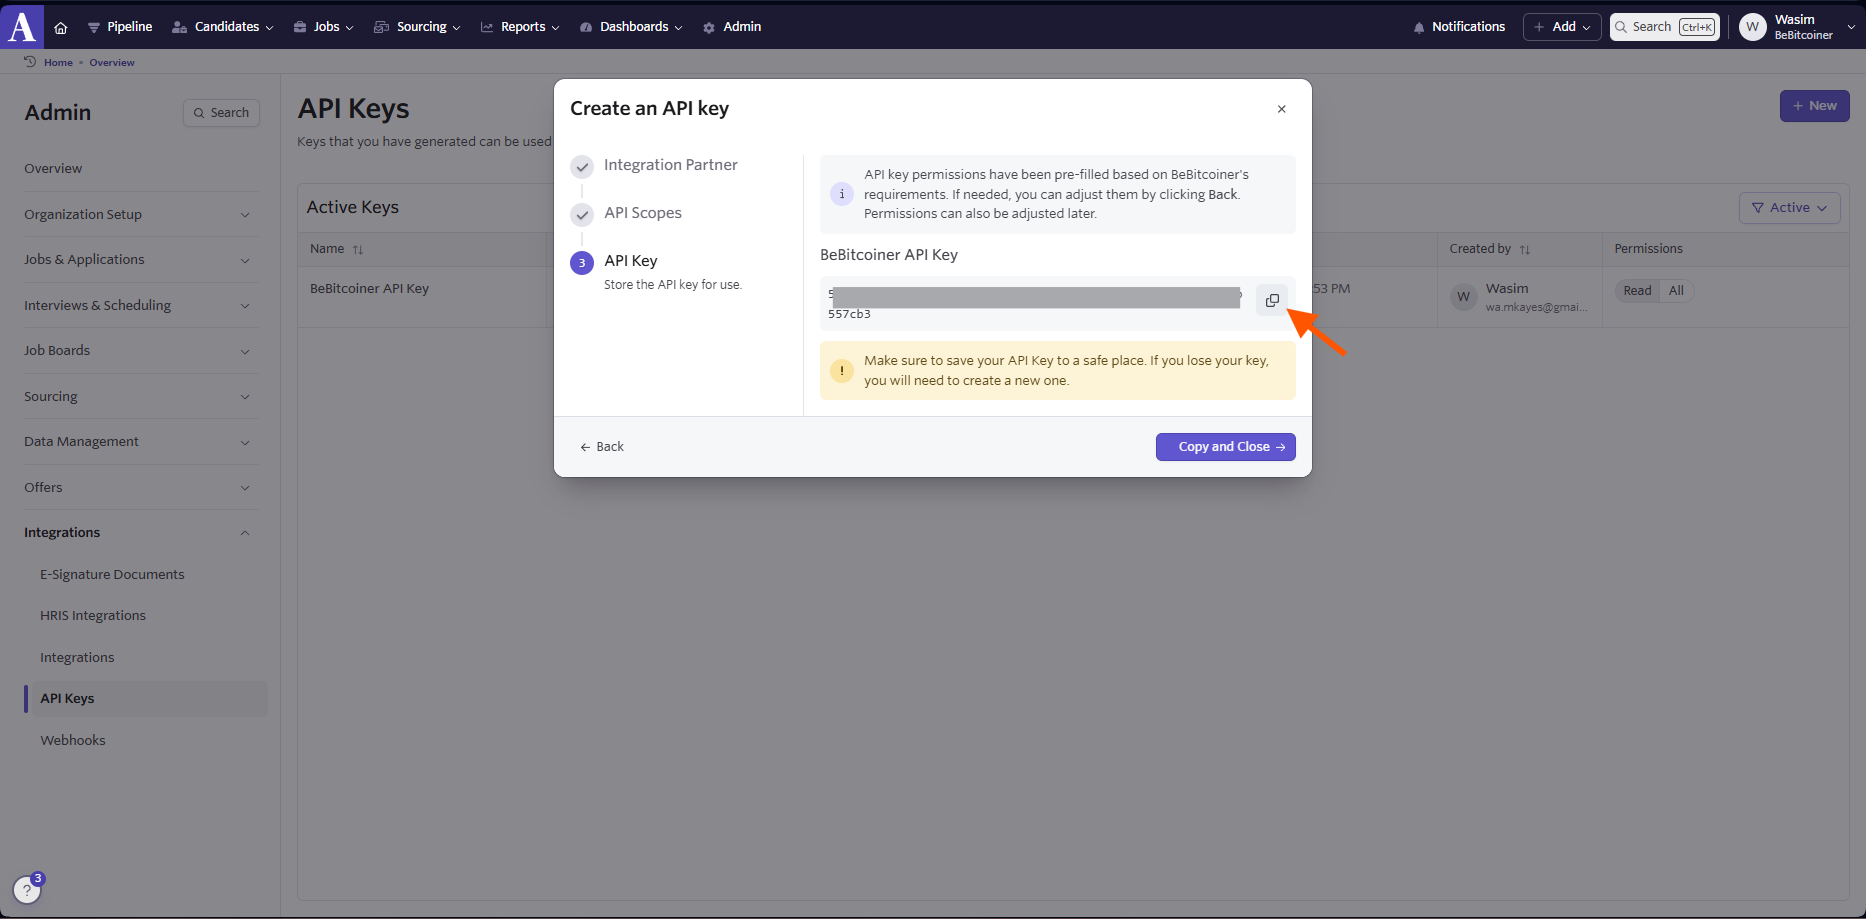
- Save and Copy the API Key
- After configuring permissions, save or generate the API key.
- The API key will be displayed on the screen. Copy the key immediately and store it securely (e.g., in a password manager or secure vault). Ashby does not allow you to retrieve the key again after closing the window.
- If you lose the key, you’ll need to generate a new one by repeating this process.

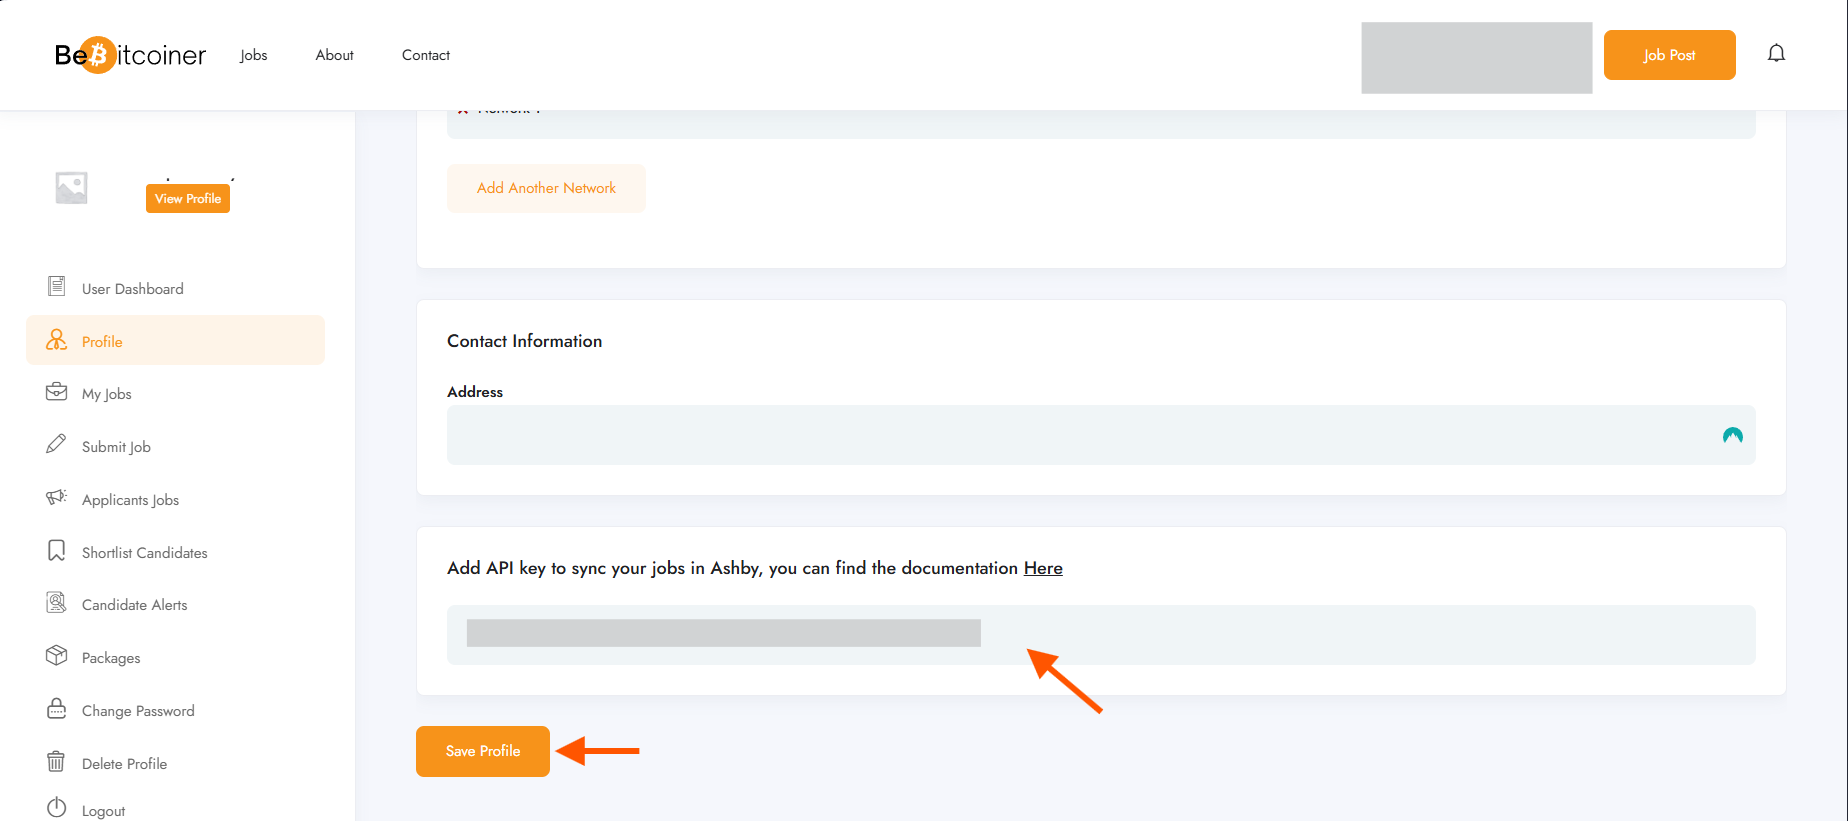
- Paste the API Key into the Ashby API field in your employer profile form

- Save the changes
**Note:
- After adding the API key, retrieving job data from Ashby may take up to 1 hour to complete.
- Job synchronization in Ashby refreshes hourly following any updates made in the platform.